insertメソッドによるデータの追加
広告
データ追加のためのSQL文を作成する代わりにテーブル名や追加する値を引数として指定してデータを追加するメソッドが用意されています。「SQLiteDatabase」クラスで用意されている「insert」メソッドを使います。
insert
public long insert(String table, String nullColumnHack, ContentValues values)
Convenience method for inserting a row into the database.

Parameters:
  table  the table to insert the row into
  nullColumnHack  SQL doesn't allow inserting a completely empty row,
    so if initialValues is empty this column will explicitly be assigned
    a NULL value
  values  this map contains the initial column values for the row. The
    keys should be the column names and the values the column values
Returns:
  the row ID of the newly inserted row, or -1 if an error occurred
1番目の引数には対象のテーブル名を指定します。
3番目の引数には追加するデータの各カラムに対する値を保持している「ContentValues」クラスのオブジェクトを指定します。
具体的には次のように記述します。
SQLiteDatabase db;
try {
    db = openDatabase("db01_01", null);
} catch (FileNotFoundException e) {
    db = null;
}

ContentValues cv = new ContentValues();
cv.put("name", "orange");
cv.put("price", 100);

db.insert("table_name", null, cv);
サンプルプログラム
それでは実際に試してみます。プロジェクトを作成しソースコードを次のように変更しました。
package jp.javadrive.android;

import android.app.Activity;
import android.os.Bundle;
import android.widget.LinearLayout;
import android.view.View;
import android.view.ViewGroup;
import android.widget.TextView;
import android.widget.EditText;
import android.widget.Button;
import android.view.View.OnClickListener;
import android.content.Context;
import android.database.sqlite.SQLiteDatabase;
import java.io.FileNotFoundException;
import android.database.SQLException;
import android.content.ContentValues;
import android.util.Log;

public class Test06_01 extends Activity implements OnClickListener{
    private final int FP = ViewGroup.LayoutParams.FILL_PARENT;
    private final int WC = ViewGroup.LayoutParams.WRAP_CONTENT;

    private Button buttonInsert;
    private EditText editName;
    private EditText editPrice;

    private SQLiteDatabase db;

    private int DB_VERSION = 1;
    private int DB_MODE = Context.MODE_PRIVATE;
    private String DB_NAME = "db_data_06";
    private String TABLE_NAME = "product";

    @Override protected void onCreate(Bundle icicle) {
        super.onCreate(icicle);

        db = null;

        LinearLayout linearLayout = new LinearLayout(this);
        linearLayout.setOrientation(LinearLayout.VERTICAL);
        setContentView(linearLayout);


        LinearLayout dataLayout = new LinearLayout(this);
        dataLayout.setOrientation(LinearLayout.HORIZONTAL);
        linearLayout.addView(dataLayout, createParam(WC, WC));

        TextView textName = new TextView(this);
        textName.setText("name");
        dataLayout.addView(textName, createParam(WC, WC));

        editName = new EditText(this);
        editName.setWidth(80);
        dataLayout.addView(editName, createParam(WC, WC));

        TextView textPrice = new TextView(this);
        textPrice.setText("price");
        dataLayout.addView(textPrice, createParam(WC, WC));

        editPrice = new EditText(this);
        editPrice.setWidth(80);
        dataLayout.addView(editPrice, createParam(WC, WC));


        LinearLayout buttonLayout = new LinearLayout(this);
        buttonLayout.setOrientation(LinearLayout.HORIZONTAL);
        linearLayout.addView(buttonLayout, createParam(WC, WC));

        buttonInsert = new Button(this);
        buttonInsert.setText("INSERT");
        buttonInsert.setOnClickListener(this);
        buttonLayout.addView(buttonInsert, createParam(WC, WC));

        openDatabase();
    }

    private LinearLayout.LayoutParams createParam(int w, int h){
        return new LinearLayout.LayoutParams(w, h);
    }

    private void openDatabase(){
        try {
            db = openDatabase(DB_NAME, null);
        } catch (FileNotFoundException e) {
            try {
                db = createDatabase(DB_NAME, DB_VERSION, DB_MODE, null);
                createTable();
            } catch (FileNotFoundException e2) {
                db = null;
                Log.e("ERROR", e2.toString());
            }
        }
    }

    private void createTable(){
        String sql = "create table " + TABLE_NAME + " ("
            + "id integer primary key autoincrement, "
            + "name text not null, "
            + "price integer);";

        try {
            db.execSQL(sql);
        } catch (SQLException e) {
            Log.e("ERROR", e.toString());
        }
    }

    public void onClick(View v) {
        String name =  editName.getText().toString();
        String price =  editPrice.getText().toString();

        if (v == buttonInsert){
            ContentValues cv = new ContentValues();
            cv.put("name", name);
            cv.put("price", price);
            db.insert(TABLE_NAME, null, cv);
        }

        editName.setText("");
        editPrice.setText("");
    }
}
ビルド後にエミュレーター上で実行します。
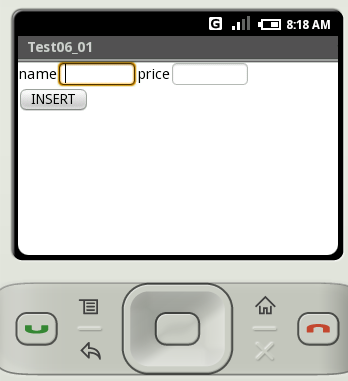
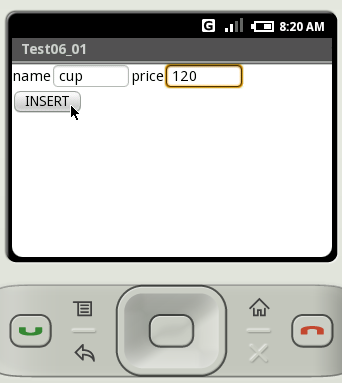
「name」と「price」に値を入力して「INSERT」ボタンをクリックして下さい。データがテーブルに追加されます。
データが追加されたかどうかシェルで確認してみます。
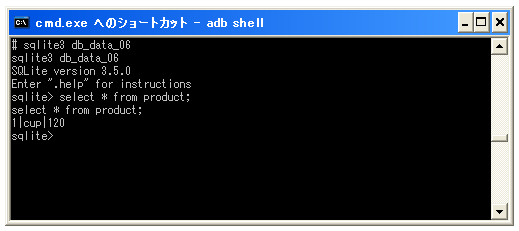
データが追加されていることが確認できました。
( Written by Tatsuo Ikura )
Profile

著者 / TATSUO IKURA
プログラミングや開発環境構築の解説サイトを運営しています。