ボタンの状態を設定
広告
ボタンを押された状態に設定することができます。「ImageButton」クラスで用意されている「setPressed」メソッドを使います。(トグルボタンではないのでクリックすると押された状態になるわけではないのですが、このメソッドを使うことで押された状態にすることができます。押された状態でボタンを再度クリックすると普通の状態に戻ります)。
setPressed
public void setPressed(boolean pressed)
Changes the button's state to pressed. When pressed, the button

Parameters:
  pressed  true to change the state to pressed, false otherwise
1番目の引数に「true」を指定するとボタンが押された状態となります。
具体的には次のように記述します。
private final int WC = ViewGroup.LayoutParams.WRAP_CONTENT;

@Override protected void onCreate(Bundle icicle) {
    super.onCreate(icicle);

    ImageButton imgbutton = new ImageButton(this);
    imgbutton.setImageResource(R.drawable.bitmapsample);
    setContentView(imgbutton, new LayoutParams(WC, WC));

    imgbutton.setPressed(true);
}
サンプルプログラム
それでは実際に試してみます。プロジェクトを作成しソースコードを次のように変更しました。
package jp.javadrive.android;

import android.app.Activity;
import android.os.Bundle;
import android.widget.LinearLayout;
import android.view.ViewGroup;
import android.widget.ImageButton;

public class Test04_01 extends Activity
{
    private final int FP = ViewGroup.LayoutParams.FILL_PARENT;
    private final int WC = ViewGroup.LayoutParams.WRAP_CONTENT;

    @Override protected void onCreate(Bundle icicle) {
        super.onCreate(icicle);

        LinearLayout linearLayout = new LinearLayout(this);
        linearLayout.setOrientation(LinearLayout.HORIZONTAL);
        setContentView(linearLayout);

        ImageButton imgbutton1 = new ImageButton(this);
        imgbutton1.setImageResource(R.drawable.star1);
        imgbutton1.setPadding(25, 25, 25, 25);
        linearLayout.addView(imgbutton1, createParam(WC, WC));

        ImageButton imgbutton2 = new ImageButton(this);
        imgbutton2.setImageResource(R.drawable.star1);
        imgbutton2.setPadding(25, 25, 25, 25);
        linearLayout.addView(imgbutton2, createParam(WC, WC));
        imgbutton2.setPressed(true);
    }

    private LinearLayout.LayoutParams createParam(int w, int h){
        return new LinearLayout.LayoutParams(w, h);
    }
}
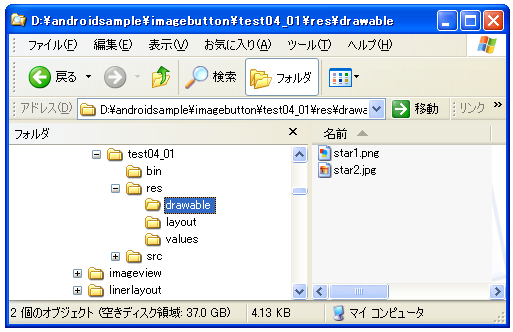
また画像をリソースとしてプロジェクト内の「res/drawable」ディレクトリに配置しました。
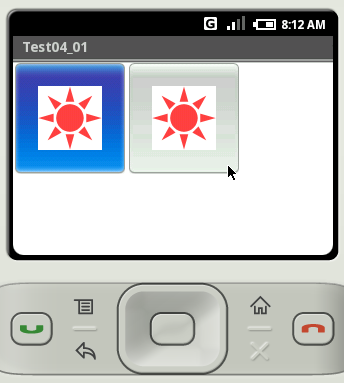
ビルド後にエミュレーター上で実行します。
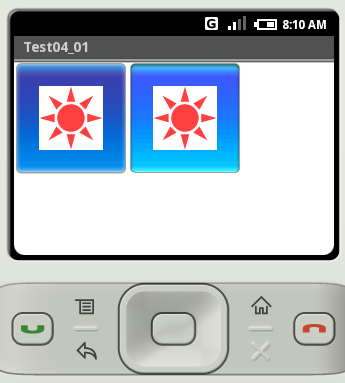
少し分かりにくいですが右側のボタンは押された状態となっています。ボタンをクリックすると通常の状態に戻ります。
( Written by Tatsuo Ikura )
Profile

著者 / TATSUO IKURA
プログラミングや開発環境構築の解説サイトを運営しています。