現在の値を進捗バーに設定する
広告
進捗バーで進捗状況を表示するには、対象となる処理の進み具合に応じて随時進捗バーに値を設定していく必要があります。進捗バーに値を設定するにはJProgressBarクラスで用意されている「setValue」メソッドを使います。
setValue
public void setValue(int n)
進捗バーの現在の値を n に設定します。このメソッドはモデルに新しい値を転
送します。

不適切な値を割り当てたことにより発生する数学的な問題は、データモデル
(BoundedRangeModel インスタンス) が処理します。

新しい値が以前の値と異なる場合は、すべての変更リスナーが通知されます。

パラメータ:
  n - 新しい値
引数には進捗バーに表示する現在の値をint型の値で設定します。設定する値は最小値と最大値の間の数値である必要があり、与えられた範囲と比較してどの程度進捗しているのかを判別して進捗バー上に表示します。
実際の使い方は次のようになります。
JProgressBar bar = new JProgressBar();
bar.setValue(10);
サンプルプログラム
では簡単なサンプルを作成して試してみます。
※サンプルではタイマーを使って時間がかかる処理を行っています。タイマーについては『Timerクラス』を参照して下さい。
import javax.swing.*;
import java.awt.BorderLayout;
import java.awt.event.*;

public class JProgressBarTest2 extends JFrame implements ActionListener{

  Timer timer;
  JButton startButton;
  JButton stopButton;
  JProgressBar bar;
  JLabel label;
  int count;

  public static void main(String[] args){
    JProgressBarTest2 frame = new JProgressBarTest2();

    frame.setDefaultCloseOperation(JFrame.EXIT_ON_CLOSE);
    frame.setBounds(10, 10, 300, 200);
    frame.setTitle("タイトル");
    frame.setVisible(true);
  }

  JProgressBarTest2(){
    count = 0;
    label = new JLabel("Not Start");

    JPanel labelPanel = new JPanel();
    labelPanel.add(label);

    startButton = new JButton("start");
    startButton.addActionListener(this);
    startButton.setActionCommand("start");

    stopButton = new JButton("stop");
    stopButton.addActionListener(this);
    stopButton.setActionCommand("stop");
    stopButton.setEnabled(false);

    JPanel buttonPanel = new JPanel();
    buttonPanel.add(startButton);
    buttonPanel.add(stopButton);

    bar = new JProgressBar();
    bar.setValue(0);

    JPanel barPanel = new JPanel();
    barPanel.add(bar);

    timer = new Timer(100 , this);
    timer.setActionCommand("timer");

    getContentPane().add(labelPanel, BorderLayout.PAGE_START);
    getContentPane().add(buttonPanel, BorderLayout.PAGE_END);
    getContentPane().add(barPanel, BorderLayout.CENTER);
  }

  public void actionPerformed(ActionEvent e){
    String cmd = e.getActionCommand();

    if (cmd.equals("start")){
      startButton.setEnabled(false);
      stopButton.setEnabled(true);

      timer.start();
    }else if (cmd.equals("stop")){
      startButton.setEnabled(true);
      stopButton.setEnabled(false);

      timer.stop();
    }else if (cmd.equals("timer")){
      label.setText(count + " count");

      if (count >= 100){
        startButton.setEnabled(true);
        stopButton.setEnabled(false);

        timer.stop();

        bar.setValue(count);

        count = 0;
      }else{
        count++;
        bar.setValue(count);
      }
    }
  }
}
上記をコンパイルした後で実行すると次のように表示されます。

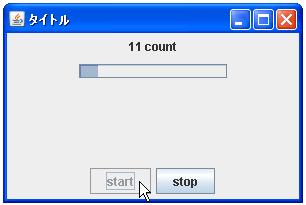
画面下の「start」ボタンをクリックすると100までカウントする処理が開始されます。今回のサンプルではカウントを一度行う毎に現在のを進捗バーに設定しています。それでは「start」ボタンをクリックして下さい。
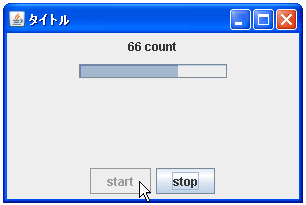
上記のように処理の進捗具合に応じて進捗バー上で棒が表示されていきます。
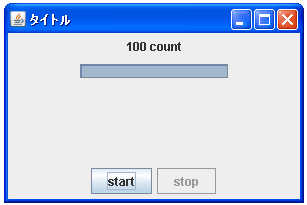
処理が全て終わった時には上記のような状態となります。
( Written by Tatsuo Ikura )

著者 / TATSUO IKURA
これから IT 関連の知識を学ばれる方を対象に、色々な言語でのプログラミング方法や関連する技術、開発環境構築などに関する解説サイトを運営しています。