ビュー毎に個別のIDを設定
アクティビティに複数のビューを配置した場合、それぞれのビューがクリックした時に何らかのイベント処理を行うということはよくあります。
例として2つのボタンを配置したビューを作成し、それぞれのボタンがクリックされた時にダイアログを表示するようなプログラムを作成してみます。まずはプログラムの中にビューの配置を直接記述していきます。
public void onCreate(Bundle savedInstanceState) {
  super.onCreate(savedInstanceState);

  LinearLayout linearLayout = new LinearLayout(this);

  Button button1 = new Button(this);
  Button button2 = new Button(this);

  button1.setText("ボタン1");
  button2.setText("ボタン2");

  linearLayout.addView(button1, new LinearLayout.LayoutParams(
    LinearLayout.LayoutParams.WRAP_CONTENT,
    LinearLayout.LayoutParams.WRAP_CONTENT));

  linearLayout.addView(button2, new LinearLayout.LayoutParams(
    LinearLayout.LayoutParams.WRAP_CONTENT,
    LinearLayout.LayoutParams.WRAP_CONTENT));

  setContentView(linearLayout);
}
上記ではまだイベント処理の部分を記述していませんが、button1オブジェクトとbutton2オブジェクトに対してイベント処理を記述することができます。
これに対し、画面レイアウトをリソースとして定義し、リソースをアクティビティに設定する場合は次のようになります。まずは画面レイアウトをリソースとして定義します。
<?xml version="1.0" encoding="utf-8"?>
<LinearLayout xmlns:android="http://schemas.android.com/apk/res/android"
    android:orientation="vertical"
    android:layout_width="fill_parent"
    android:layout_height="fill_parent"
    >
  <Button
      android:layout_width="wrap_content"
      android:layout_height="wrap_content"
      android:text="保存"
      />
  <Button
      android:layout_width="wrap_content"
      android:layout_height="wrap_content"
      android:text="キャンセル"
      />
</LinearLayout>
作成したレイアウト用のリソースをプログラムの中から参照しアクティビティに設定します。
public void onCreate(Bundle savedInstanceState) {
  super.onCreate(savedInstanceState);

  setContentView(R.layout.gamen);
}
この方式の場合、画面レイアウト全体が1つのリソースとなっています。その為、画面レイアウトに配置された個々のビューに対してイベント処理を行おうとする場合、個々のビューをリソースの中から取り出す必要があります。
ビューにIDを設定
レイアウト用のリソースの中に記述された個々のビューに対してIDを設定するには属性「id」を使い次の構文で名前を付けていきます。
id="@+id/名前"
それでは先ほどのレイアウト用のXMLファイルの中の個々のビューにIDを設定していきます。
<?xml version="1.0" encoding="utf-8"?>
<LinearLayout xmlns:android="http://schemas.android.com/apk/res/android"
    android:orientation="vertical"
    android:layout_width="fill_parent"
    android:layout_height="fill_parent"
    >
  <Button
      android:id="@+id/save_button"
      android:layout_width="wrap_content"
      android:layout_height="wrap_content"
      android:text="保存"
      />
  <Button
      android:id="@+id/cancel_button"
      android:layout_width="wrap_content"
      android:layout_height="wrap_content"
      android:text="キャンセル"
      />
</LinearLayout>
ビューにIDを割り当てると、他のリソースと同じようにプロジェクトのビルド時にR.javaファイルに個々のビューに対するリソースIDが設定されます。
public final class R {
    public static final class id {
        public static final int save_button=0x7f050001;
        public static final int cancel_button=0x7f050000;
    }
}
R.javaファイルの中ではリソースの種類が「id」のリソースとしてIDが登録されます。よってプログラムの中からこれらのリソースを参照する場合は「R.id.リソース名」で参照することになります。
全てのビューにIDを割り当てる必要はありません。プログラムの中から個別に参照したいビューに対してだけ設定を行って下さい。
IDからビューを取得
ビューに対して割り当てられたリソースIDから対応するビューオブジェクトを取得してみます。Activityクラスで定義されているfindViewByIdメソッドを使用します。
findViewById
public View findViewById(int id)
Finds a view that was identified by the id attribute from the XML that was processed
in onCreate(Bundle).


Returns
  The view if found or null otherwise.
引数にリソースIDを指定すると、対応するビューのオブジェクトを返します。実際に使用する時は戻り値をそのビューのクラスでキャストして下さい。
例えば次のように使用します。
Button button = (Button)findViewById(R.id.my_button);
この場合、リソースの名前が「my_button」のビューのオブジェクトを取得します。このビューはButtonクラスのオブジェクトですのでButtonクラスでキャストして取得しています。より具体的な使い方は、この後のサンプルプログラムを参照して下さい。
サンプルプログラム
では実際に試してみます。「アクティビティの追加」を参考に「Test6_1Activity」をプロジェクトに追加し、起動時にこのアクティビティが呼び出されるように設定します。
今回は2つのボタンと1つのテキストビューを設置し、ボタンが押されるとテキストビューにメッセージが表示されるようにしてみます。イベント処理などの細かい記述方法はまた別のページで確認しますのでここでは参考程度に見ておいて下さい。
作成された「Test6_1Activity.java」ファイルを次のように記述します。
package jp.javadrive.resource;

import android.app.Activity;
import android.os.Bundle;
import android.widget.Button;
import android.widget.TextView;
import android.view.View;

public class Test6_1Activity extends Activity {
    @Override
    public void onCreate(Bundle savedInstanceState) {
        super.onCreate(savedInstanceState);

        setContentView(R.layout.test6_1);

        Button jp_button = (Button)findViewById(R.id.jp_button);
        Button en_button = (Button)findViewById(R.id.en_button);
        final TextView msg_text = (TextView)findViewById(R.id.msg_text);

        jp_button.setOnClickListener(new View.OnClickListener() {
            public void onClick(View v) {
              msg_text.setText("こんにちは");
            }
        });

        en_button.setOnClickListener(new View.OnClickListener() {
            public void onClick(View v) {
              msg_text.setText("Hello");
            }
        });
    }
}
「test6_1.xml」というファイルを作成し、作成したプロジェクトの「res/layout」ディレクトリに配置します。ファイルの中身は次のようにします。
<?xml version="1.0" encoding="utf-8"?>
<LinearLayout xmlns:android="http://schemas.android.com/apk/res/android"
    android:orientation="vertical"
    android:layout_width="fill_parent"
    android:layout_height="fill_parent"
    >
  <Button
      android:id="@+id/jp_button"
      android:layout_width="wrap_content"
      android:layout_height="wrap_content"
      android:text="日本語"
      />
  <Button
      android:id="@+id/en_button"
      android:layout_width="wrap_content"
      android:layout_height="wrap_content"
      android:text="English"
      />
  <TextView
      android:id="@+id/msg_text"
      android:layout_width="wrap_content"
      android:layout_height="wrap_content"
      android:text=""
      />
 </LinearLayout>
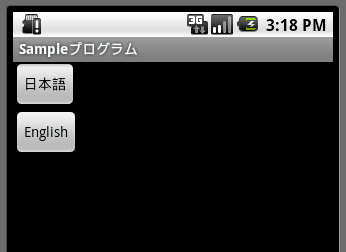
では実行してみます。
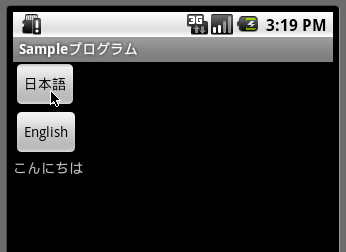
"日本語"と書かれたボタンを押すと次のようにメッセージが画面上に表示されます。
また"English"と書かれたボタンを押すと次のようにメッセージが画面上に表示されます。
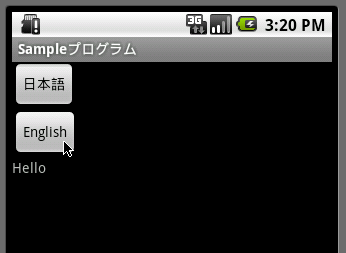
このようにレイアウトの中の個々のビューにIDを設定することで、プログラムの中から個々のビューを参照することができます。
( Written by Tatsuo Ikura )

著者 / TATSUO IKURA
プログラミングや開発環境構築の解説サイトを運営しています。