エリア内での表示方法
画像を表示するImageViewクラスのオブジェクトの大きさと、表示される画像の大きさが異なる場合に、ImageViewのエリア内で画像をどのように表示するかを設定する方法を確認します。「ImageView」クラスで用意されている「setScaleType」メソッドを使います。
setScaleType
public void setScaleType(ScaleType scaleType)
Control how the image should be resized or moved to match the size of
this ImageView.

Related XML Attributes:
  android:scaleType
Parameters:
  scaleType  The desired scaling mode.
1番目の引数に表示方法を表す値をImageView.ScaleTypeクラスで定義されている定数を使って指定します。
設定可能な値は「android.widget.ImageView.ScaleType」クラスで定義されており次の7つの値が用意されています。
ScaleType  CENTER
ScaleType  CENTER_CROP
ScaleType  FIT_CENTER
ScaleType  FIT_END
ScaleType  FIT_START
ScaleType  FIT_XY
ScaleType  MATRIX
それぞれの値を設定した時にどのように表示されるかを示します。
CENTER       サイズ変更せずにエリアの中央に表示
CENTER_CROP  エリアの横幅まで画像を拡大し中央に表示
FIT_CENTER   エリアの縦幅まで画像を拡大し中央に表示
FIT_END      エリアの縦幅まで画像を拡大し右端に寄せて表示
FIT_START    エリアの縦幅まで画像を拡大し左端に寄せて表示
FIT_XY       エリア全体に画像を拡大して表示
MATRIX       不明
より具体的な表示イメージはサンプルを参照して下さい。なお「MATRIX」は不明です。
具体的には次のように記述します。
private final int WC = ViewGroup.LayoutParams.WRAP_CONTENT;

@Override protected void onCreate(Bundle icicle) {
    super.onCreate(icicle);

    ImageView image = new ImageView(this);
    image.setImageResource(R.drawable.bitmapsample);
    image.setScaleType(ImageView.ScaleType.CENTER);
    setContentView(image, new LayoutParams(WC, WC));
}
サンプルプログラム
それでは実際に試してみます。プロジェクトを作成しソースコードを次のように変更しました。
package jp.javadrive.android;

import android.app.Activity;
import android.os.Bundle;
import android.widget.LinearLayout;
import android.view.View;
import android.view.ViewGroup;
import android.widget.ImageView;
import android.graphics.Color;
import android.widget.Button;
import android.view.View.OnClickListener;

public class Test05_01 extends Activity implements OnClickListener
{
    private final int FP = ViewGroup.LayoutParams.FILL_PARENT;
    private final int WC = ViewGroup.LayoutParams.WRAP_CONTENT;

    private Button buttonCenter;
    private Button buttonCenterCrop;
    private Button buttonFitCenter;
    private Button buttonFitEnd;
    private Button buttonFitStart;
    private Button buttonFitXY;
    private Button buttonMatrix;

    private ImageView image;

    @Override protected void onCreate(Bundle icicle) {
        super.onCreate(icicle);

        LinearLayout linearLayout = new LinearLayout(this);
        linearLayout.setOrientation(LinearLayout.VERTICAL);
        linearLayout.setBackgroundColor(Color.BLACK);
        setContentView(linearLayout);


        LinearLayout btnLinearLayout1 = new LinearLayout(this);
        btnLinearLayout1.setOrientation(LinearLayout.HORIZONTAL);

        buttonCenter = new Button(this);
        buttonCenter.setText("Center");
        buttonCenter.setOnClickListener(this);

        buttonCenterCrop = new Button(this);
        buttonCenterCrop.setText("CenterCrop");
        buttonCenterCrop.setOnClickListener(this);

        buttonFitCenter = new Button(this);
        buttonFitCenter.setText("FitCenter");
        buttonFitCenter.setOnClickListener(this);

        LinearLayout btnLinearLayout2 = new LinearLayout(this);
        btnLinearLayout2.setOrientation(LinearLayout.HORIZONTAL);

        buttonFitEnd = new Button(this);
        buttonFitEnd.setText("FitEnd");
        buttonFitEnd.setOnClickListener(this);

        buttonFitStart = new Button(this);
        buttonFitStart.setText("FitStart");
        buttonFitStart.setOnClickListener(this);

        buttonFitXY = new Button(this);
        buttonFitXY.setText("FitXY");
        buttonFitXY.setOnClickListener(this);

        buttonMatrix = new Button(this);
        buttonMatrix.setText("Matrix");
        buttonMatrix.setOnClickListener(this);

        btnLinearLayout1.addView(buttonCenter, createParam(WC, WC));
        btnLinearLayout1.addView(buttonCenterCrop, createParam(WC, WC));
        btnLinearLayout1.addView(buttonFitCenter, createParam(WC, WC));
        btnLinearLayout2.addView(buttonFitEnd, createParam(WC, WC));
        btnLinearLayout2.addView(buttonFitStart, createParam(WC, WC));
        btnLinearLayout2.addView(buttonFitXY, createParam(WC, WC));
        btnLinearLayout2.addView(buttonMatrix, createParam(WC, WC));

        linearLayout.addView(btnLinearLayout1, createParam(FP, WC));
        linearLayout.addView(btnLinearLayout2, createParam(FP, WC));


        image = new ImageView(this);
        image.setImageResource(R.drawable.star1);
        linearLayout.addView(image, createParam(200, 100));
    }

    private LinearLayout.LayoutParams createParam(int w, int h){
        return new LinearLayout.LayoutParams(w, h);
    }

    public void onClick(View v) {
        if (v == buttonCenter){
            image.setScaleType(ImageView.ScaleType.CENTER);
        }else if (v == buttonCenterCrop){
            image.setScaleType(ImageView.ScaleType.CENTER_CROP);
        }else if (v == buttonFitCenter){
            image.setScaleType(ImageView.ScaleType.FIT_CENTER);
        }else if (v == buttonFitEnd){
            image.setScaleType(ImageView.ScaleType.FIT_END);
        }else if (v == buttonFitStart){
            image.setScaleType(ImageView.ScaleType.FIT_START);
        }else if (v == buttonFitXY){
            image.setScaleType(ImageView.ScaleType.FIT_XY);
        }else if (v == buttonMatrix){
            image.setScaleType(ImageView.ScaleType.MATRIX);
        }
    }
}
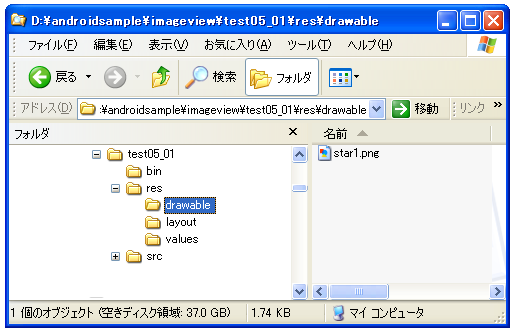
また画像をリソースとしてプロジェクト内の「res/drawable」ディレクトリに配置しました。
ビルド後にエミュレーター上で実行します。
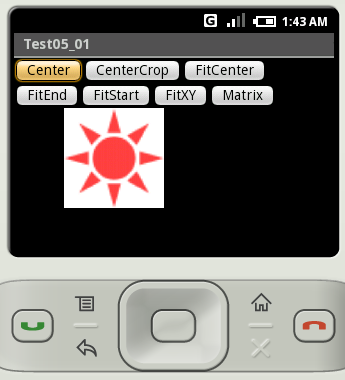
デフォルトでは上記のように表示されています。画像の大きさは64×64ピクセル、ImageViewクラスのオブジェクトの大きさは200×100ピクセルにしてあります。では順に試していきます。
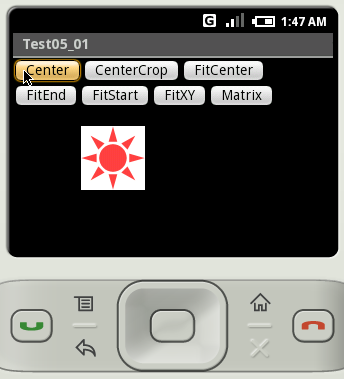
「Center」ボタンをクリックすると画像のサイズを変更せずに表示エリアの中央に表示します。
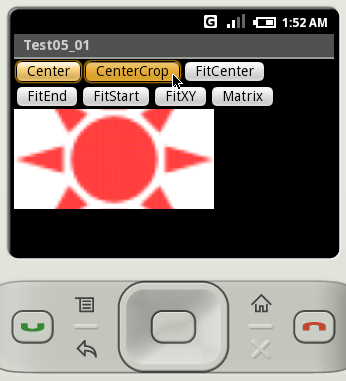
「CenterCrop」ボタンをクリックすると表示エリアの横幅まで画像を拡大し中央に表示します。
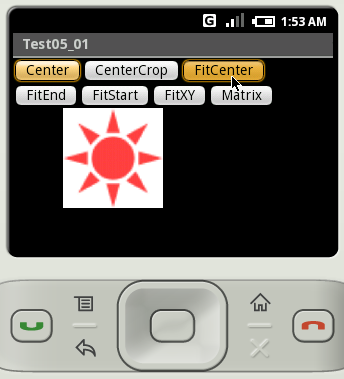
「FitCenter」ボタンをクリックすると表示エリアの縦幅まで画像を拡大し中央に表示します。
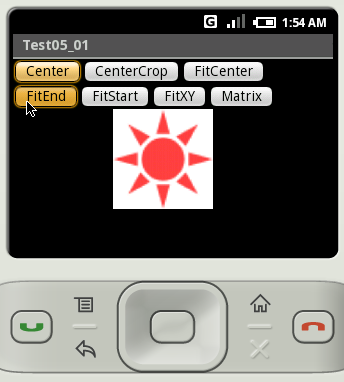
「FIT_END」ボタンをクリックすると表示エリアの縦幅まで画像を拡大し右端に寄せて表示します。
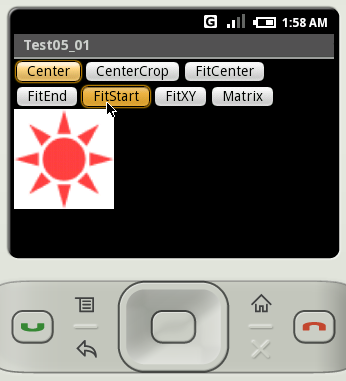
「FIT_START」ボタンをクリックすると表示エリアの縦幅まで画像を拡大し左端に寄せて表示します。
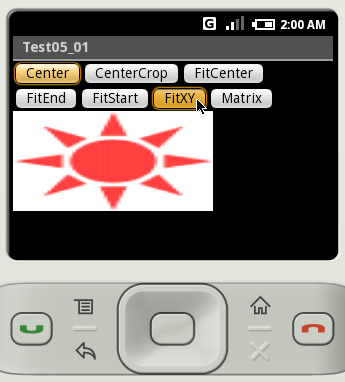
「FIT_XY」ボタンをクリックすると表示エリア全体に画像を拡大して表示します。
( Written by Tatsuo Ikura )

著者 / TATSUO IKURA
プログラミングや開発環境構築の解説サイトを運営しています。